There are quite a few dairy-free ice creams on the market now. These have become a great treat for me, and it's fun to try all of the different varieties!
Purely Decadent has a pretty big line of dairy-free ice creams. I have tried both their regular, soy based ice cream, and the coconut milk version. Personally, I don't like the soy version, it seems like it has an unpleasant aftertaste... but the coconut milk version is amazing!
Another brand is NadaMoo with a ton of flavors! I've just started sampling this brand.
Then there are the soy ice creams- Soy Dream and others. Personally, try to avoid soy as much as possible as a main ingredient in food. If I'm going to do a non-dairy version of something, usually I try to go with almond or coconut milk, just because soy is in everything to begin with, and with all of the phytoestrogens in it, I don't think it's something we should eat so much of.
Rice Dream is made from rice milk. It actually tastes pretty good too. My only problem with this brand is that they don't have any gluten-free versions of any that aren't just plain ice cream flavors... I like my ice cream with mix-ins!
There is also another new option- Almond Dream ice cream (they don't have a page for this on their website yet!). This is good, but the ice cream seems to be frozen harder than the other versions... which makes it a little more difficult to eat, unless you have patience to wait for it to soften up. Patience is not a virtue that I possess...
I've decided that if I'm going to eat all this ice cream, maybe I should review it as I try the different varieties!
Purely Decadent Made with Coconut Milk:
Chocolate- VERY GOOD. Rich, smooth, creamy, satisfying! A little bit satisfies my ice cream craving.
Cookie Dough- I was so excited when Dave brought this home for me! Not only is it dairy free, it's also gluten free, even with the yummy little chunks of cookie dough in it! This is very good!
Mint Chip- Very good! I've always liked mint ice cream for when I have a stomach ache/heartburn. This does the trick!
I've also had some chocolate and almond covered bars with coconut milk ice cream in them, they were wonderful too!
NadaMoo Coconut Milk Ice Cream:
Java Chip- eh, not so much. Got this thinking it sounded good, but I really don't like it. Don't like the texture with all the little chunks, I'm assuming they are ground up espresso beans based on the ingredients... but it doesn't look like the picture on the carton, and it really wasn't good. I think I will take it back and try a different flavor.
Purely Decadent Soy Based:
Turtle Trails- I REALLY wanted to like this. But honestly, I didn't. The ice cream itself just didn't taste right.
Rice Dream:
Mint Carob Chip- good, but unfortunately I realized later that it's not gluten-free!
Almond Dream:
Praline Crunch- very good! Frozen super hard... if I thought ahead I would take it out of the freezer 5-10 minutes before I wanted to eat it probably...
Friday, May 28, 2010
Gluten-Free Product Review: PF Chang's
I love PF Chang's Lettuce Wraps. They've been my favorite thing there for years... tonight we tried PF Chang's Gluten Free menu for the first time.
The Chicken Lettuce Wraps were good. They tasted pretty much the same to me as the non-GF version. The only difference was the "special sauce", it was specially marked as Gluten-Free and tasted a little different (and was pre-mixed).
We also tried the Singapore Street Noodles. These are my favorite meal from Asian Cafe & Grill, right down the street from our house (but I doubt they're GF from there!). PF Chang's GF version tasted a little bland to me. I added some curry powder, some GF Tamari Soy Sauce, and a squeeze of lime, and it was better. Dave thought it was a little spicy... I probably added too much curry powder.
Overall, it was pretty much what I expected... and we will probably do PF Chang's Gluten Free menu again for a date night or something. I probably wouldn't order the Singapore Street Noodles if we were going to eat at the restaurant, but if we were doing take out again, I might, since I can easily fix it with a little curry powder.
If I had a little star rating, PF Chang's GF menu would probably score a 3 or 3.5 out of 5.
FLYing Day 1 Completed!

No Poo?
I know what you're thinking... HUH? Is she talking about poop? Well, I do have a chronically constipated daughter with short bowel syndrome, so that wouldn't be completely abnormal... But no, I'm not talking about poop! I try to keep those topics limited to Faith's blog.
So, what am I talking about? I'm talking about a super simple, super cheap way to take care of your hair! With the exception of about a week, I have been shampoo-free since January 2010. At first glance, it seems complicated, not worth the effort, etc... but I don't honestly think I will ever go back to shampoo! (Seriously, I tried... when the seasons changed from winter to spring, my hair got funky, so I went out and bought some natural shampoo, and I have used it maybe twice, it just doesn't get my hair clean!)
How do you go shampoo-free, you ask? It starts with 2 simple ingredients- baking soda and apple cider vinegar. You'll also want to have a container of some sort for the baking soda, and an empty (washed) shampoo bottle for the cider vinegar. I use a small plastic food storage container for the baking soda.
There are many ways to do No Poo... some people use very diluted baking soda, some use thicker paste, some people put it on dry hair, some do it in the shower... you have to experiment and see what works best for you.
Personally, I put probably about a cup of baking soda into my container, add maybe 10-15 drops of Tea Tree Oil, and sometimes some Eucalyptus Oil. Then I add water until it forms a thin paste, not much of a different consistency than actual shampoo. I keep the container on a shelf in the shower. I wet my hair thoroughly when I get in the shower, then scoop up a little handful of the baking soda mixture and scrub it all over my head. It doesn't lather like shampoo, but I do use pretty much the same technique that I would use to lather shampoo. Then I let it sit in my hair for a minute or two, before rinsing with my shower turned to a high-pressure setting to get all of the baking soda out.
Maybe once a week or every 2 weeks, I follow with a rinse of the apple cider vinegar. I fill my empty shampoo bottle about halfway with vinegar, and then add water to fill it all the way. Some people add essential oils to the vinegar to make it smell better, but since I don't use it that often, I prefer to add my oils to my baking soda. I shake it before I use it, then just pour it on my head (being careful not to get it in my eyes- vinegar BURNS!). You can rinse it or leave it in, personally I rinse it out. I have experimented with using the cider vinegar more often, but it makes my hair oilier than using the baking soda alone.
The benefits of going No Poo? Well, I used to have to wash my hair EVERY DAY. I was lucky to even make it 24 hours without my hair ending up totally oily and dirty looking. Now, I use baking soda every other day, at most. Most weeks, I only need to "wash" my hair with baking soda 2-3 times a week. My hair is super healthy, has good body, and is shiny and nice. And, baking soda is CHEAP! I buy the big 12-lb bags that they sell by the swimming pool supplies, the last bag I bought cost less than $6, and I've used it for baking, cleaning, and bath & body care!
Let me know if you try this, and what works for you!
GF/DF Cheesecake Bites
Raw Gluten-Free, Dairy-Free Cheesecake Bites!
These are SO good, and super simple to make! They are a wonderful item to bring to potlucks, although they do need to be kept fairly cool, or refrigerated until just before serving. Pictures to come!
1 1/2 cups raw cashews
6 Tbsp melted coconut oil
1 Tbsp lime juice
1/4 c raw honey
1 Tbsp vanilla
*optional* 1 tsp+ ground cinnamon
extra ground cashews, almonds, macadamia nuts, hazelnuts, or whatever type of nuts you like!
Place cashews in a jar or a bowl, cover with cold filtered water, and soak for 4 hours. Drain, rinse, and place into the bowl of a food processor. Add coconut oil, lime juice, honey, and vanilla. Puree until smooth. Transfer into a bowl, freeze for about 1/2 hour, just until mixture starts to harden.
Add extra ground nuts to a shallow dish. Add cinnamon, if desired. Remove cheesecake mixture from freezer, and scoop a small spoonful into your hand. Roll it into a ball, then roll in ground nuts, and place on a parchment-lined cookie sheet. Continue with the remaining mixture. Freeze cheesecake balls for 1-2 hours, until solid, then enjoy!
Here we go! FLYing Day 1
Well, I've been getting the FLYLady emails for at least a year. They haven't done me much good, mostly because I haven't consistently read them! And it's hard when you feel like you're jumping in late, having started and stopped in the beginning, trying to re-start 3 months later, trying to re-start 4 months after that...
So, I canceled the FLYLady emails, so that I could re-join back at the beginning. And I'm planning to share my FLYing journey here! Hopefully this will be the motivation I need to declutter my life and develop a routine that works! The program uses BabySteps to help it be less overwhelming, which sounds good to me!
The BabyStep for Day 1 is "Go Shine Your Sink". I will post a picture when I'm done!
(for more about FlyLady and her method for organizing your life to eliminate CHAOS, visit her website!)
Monday, May 24, 2010
Well...
I guess I'm not doing that well following through with my goals for this blog! The busy-ness of life is overwhelming lately. We have something going almost every day of the week, between meeting clients for my doula business, appointments for myself and the kids, and *trying* to have some semblance of a normal family life.
Meal planning is going pretty well, and is definitely helpful. Noah had a wonderful birthday party on Saturday, complete with a solar system cake/cupcake arrangement. I will post pictures, as soon as someone emails them to me :)
In the meantime, the reason I do everything I do:


Meal planning is going pretty well, and is definitely helpful. Noah had a wonderful birthday party on Saturday, complete with a solar system cake/cupcake arrangement. I will post pictures, as soon as someone emails them to me :)
In the meantime, the reason I do everything I do:


Thursday, May 20, 2010
Homemade Almond or Cashew Flour
Alternative flours for gluten-free baking can be very expensive. Any time I see them on sale, or when I shop at the commissary on the Air Force Base, I pick up various mixes, because it's the only way to afford them. But, I have learned a couple of ways now to make my own nut flours, both of which are simple and use appliances that most people have in their kitchens.
The first way uses the leftover pulp from making Almond or Cashew milks. You start out by making your milk (I make Almond Milk using this recipe). Spread the pulp out on a parchment-lined cookie sheet and dehydrate in your oven, as low as it can go, until it is completely dry. Let it cool completely, then grind it in a coffee grinder to make a fine powder.
The other way to make nut flour just uses the coffee grinder. You can soak your almonds or cashews and them let them dry before grinding, or if you are in a hurry, just throw them into the grinder. Pulse the grinder until you have a fine powder. It will stick to the sides of the grinder, just loosen it up with a spoon (or your finger) and dump it into a bowl. I store my homemade nut flours in jars.
These flours might not work as well as purchased versions in some baking recipes, but I have used them to make raw cookies, pancakes, and chocolate chip cookies with success.
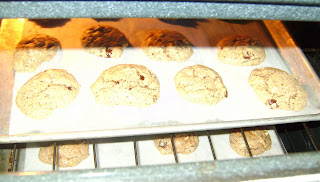
Gluten- and Dairy-Free Chocolate Chip Cookies
Yum! I have been craving chocolate chip cookies for so long! I've made some raw versions a few times, and they were good, but really didn't kill the craving... and then I found this recipe. It was already gluten-free, and I easily converted it to dairy-free, with the help of some coconut oil and a Boom Choco Boom bar. These are nice puffy, light cookies, a little nutty and not too sweet. I think they would be nice with a small glass of almond milk. I enjoyed them with a glass of Lactaid (my dairy problems are lactose-related).

Gluten- and Dairy-Free Chocolate Chip Cookies
Preheat your oven to 350 degrees, and line a couple of cookie sheets with parchment paper or silicone liners.
In a large bowl, mix your dry ingredients:
2 3/4 cups of almond flour (you can buy it, but I make my own)
1/2 tsp salt
1/2 tsp baking soda
Make a well in the dry ingredients, and add to the well:
2 eggs
1/4 cup maple syrup (I think I might add a little extra sweetener next time)
1/3 cup coconut oil, melted
1 tbsp vanilla extract
1 Boom Choco Boom bar, broken into chunks
1/2 cup dehydrated coconut
Mix all ingredients well, and scoop by heaping tablespoons onto your prepared cookie sheets. Bake for 10-15 minutes, or until they just start to turn golden brown around the edges, and they don't dent when you push on them. They will be shiny and look wet, but when you touch them, they are dry.
Remove from the cookie sheet and cool on a wire rack, and enjoy!


Monday, May 10, 2010
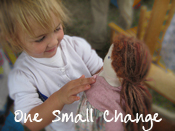
Crunchy Habit to Try- May 2010
Coming up with a change to make for May was actually a bit of a challenge. I don't like to brag, but I feel like as a family, we already do quite a bit around the house to help the environment. I've used cloth diapers since Noah was about 1 month old, we rarely use anything disposable (no paper towels, no paper napkins, no paper plates...), I already hang my laundry (mostly my diapers) on the line to dry, I garden, I use natural cleaning solutions, natural bath & body products, etc. Finally though, I decided on a change. It's one of those things that I know some friends of mine probably do, but no one really talks about...
I've thought about doing it for awhile. Replacing pretty much the only disposable/single use paper item we still buy with a washable, reusable alternative. I wondered what Dave would say, if he'd do it, etc... then I decided it really didn't matter, because even if only I stopped using this one single use item, it would make a pretty big difference. Yep, I'm talking about toilet paper.

How, exactly, do you stop using toilet paper? Simple- I have about a zillion cloth wipes, little washcloths, scraps of fabric, etc. that I use on Faith's but in place of disposable baby wipes. I have at least 3-4 times as many as I need just for her. In fact, I have so many, that I had a bag of them that we'd used when she was still at the hospital (over a year ago now) that was just taking up space in the cupboard in our bathroom.
So, as I was cleaning out that cupboard and reorganizing it, I decided to just do it, and start using them in place of TP. I had a basket that sat on the back of the toilet and held a couple of washcloths and some little soaps, as a decoration. I took those things out, put the wipes in, and set it down next to the toilet under the TP holder. Then, I took the plastic wipes container that I used to keep Faith's wipes in, and set it next to the basket, to hold used wipes.
When the container is full, I will dump them in with a load of diapers to wash. It's that easy! And, as the only potty-using female in the house, I am naturally the largest consumer of TP in our home, so by replacing my TP use with washable, reusable wipes instead, I hope to make a big dent in our TP consumption! Replace TP with wipes for Noah, even more of a dent! And if I could eventually coax Dave into using the wipes instead, that would mean we would only be using toilet paper for guests!
How's it working so far? I actually prefer the wipes to toilet paper. They work MUCH better for Noah, too... and the roll is definitely lasting longer!
My Goals for this Blog
I decided to write an actual post about what I intend to do here, in hopes of forcing some accountability on myself to actually do what I say!
- Write at least one post, hopefully 6 days a week (one for each weekday, and one for the weekend).
- Post at least 1-2 new recipes each week.
- Post current crafting projects, as they are begun, and post progress pictures of projects until they are completed.
- Post one "Small Change" (aka: Crunchy Habit) each month, with progress of how each change is going.
- Post resources on each page, with a goal of posting something for each category each week.
Friday, April 23, 2010
Gluten- and Dairy-Free Pork Schnitzel with Sweet & Sour Red Cabbage
Gluten-Free/Dairy-Free Pork Schnitzel with Sweet and Sour Red Cabbage (pictures to come!)
Schnitzel Recipe:
4-5 boneless pork loin chops, pounded thin
1 egg, beaten
1 cup finely ground almonds
garlic powder, salt, pepper and other seasonings to taste
1 Tbsp olive oil
2-3 Tbsp corn starch
1 cup water
- Thaw your pork chops if frozen. Place on a cutting board (one that can be sanitized), and cover with a sheet of plastic wrap. Pound the pork chops, one at a time, with the flat side of your meat tenderizer.
- Crack the egg into a shallow dish that will fit one of the flattened pork chops, and beat it well. Put the almonds into another shallow dish and season with garlic powder, salt, and pepper (and/or whatever seasonings you would like).
- Working one at a time, place the flattened pork chops first into the egg, coating well and then letting the excess drip back into the dish, and then placing them into the ground almonds. Make sure the pork chops are well coated with the ground almonds, and when all of the chops are coated, place them on a plate and refrigerate about 1/2 hour. (This will help the "breading" to stick.)
- Heat a large skillet over med-high heat, and add the olive oil to the skillet. Place the pork chops into the skillet and brown well. When the first side is well browned, flip and brown the other side. When both sides are browned, remove the pork chops from the pan to a clean plate (not the plate the raw chops were on in your refrigerator!).
- In a glass measuring cup, mix the corn starch and the water. Pour these into the skillet the pork chops were cooked in. Stir well, scraping the bottom of the pan to get the browned bits incorporated into what will become your gravy. Continue stirring well, bring to a boil, and cook until thickened. Season as desired.
- When the gravy is done, add the pork chops back to the skillet, turn the heat down, and cook them until they are done completely through.
Serve with Sweet & Sour Red Cabbage.
Red Cabbage Recipe:
1 small to medium head of red cabbage
2 apples (I used organic Braeburns), peeled and thinly sliced
2-3 carrots, peeled and cut into matchstick pieces (optional)
1/4-1/2 cup apple cider vinegar
1/4-1/2 cup brown sugar
- Thinly slice/shred your head of red cabbage, and place it into a saucepan. Repeat with apples, and carrots if you choose.
- Add cider vinegar and brown sugar, and mix well.
- Turn stove to medium, place lid on pan, and cook until cabbage is soft, stirring occasionally. Taste, and adjust cider vinegar and sugar amounts, if needed.
Serve with Schnitzel or other German food.
Tuesday, April 6, 2010
What's for supper? April 6, 2010
Cornish Game Hens with Roasted Cauliflower, Carrot, and Garlic Puree, and sauteed Spinach

Cornish Hens were on sale the other day at the grocery store, so I picked up a few of them. They are a great, faster alternative to a roast chicken, and I especially loved cooking one just for Noah and myself to share when Dave was gone for his army training.
I treat the hens basically the same as I would a regular chicken when cooking them. First and foremost, you want to take them out of the wrapper and rinse them well under cold water. Pull off any stray feathers, run water into the cavity and just really rinse it out.
After that, you'll want to pick a baking pan that is an appropriate size for the number of hens you will be roasting. I am roasting 3 hens, so I am using a 9 x 13 glass baking dish. Place the rinsed hens into the pan, and pat them dry.


To roast the veggies for the puree, simply clean them, cut them into pieces (they can be fairly large), and spread them on a baking sheet. Remember to save any of the parts you cut off to use in stock! For tonight's supper, I am roasting cauliflower and carrots, and a head of garlic to puree with them to make mock mashed potatoes.
 Drizzle or brush the veggies with olive oil, sprinkle with salt and pepper, and roast them in the oven at 400 degrees until they are done (maybe 15 minutes).

 To make the spinach, wash the leaves well, pull off the stems, and throw them into a big, hot pan with some olive oil and garlic (and whatever else you want in it- the other day I did some turkey bacon, garlic, and onion). It will take A LOT of spinach to cook into an amount that will feed more than one person. I can feed Dave and I each a small side of spinach from one big bunch. Since Noah doesn't eat it, that works well for us.
Put a lid on the pan, and just let the spinach wilt down. Once it is mostly wilted, then you can stir it around and mix the olive oil and flavorings into it. Sprinkle with salt or whatever other spices you want, and serve. Spinach only takes maybe 5-10 minutes total to prepare and cook, so save this for the last thing you do, right before you serve supper.
Enjoy your supper! I know we will enjoy ours :)


Cornish Hens were on sale the other day at the grocery store, so I picked up a few of them. They are a great, faster alternative to a roast chicken, and I especially loved cooking one just for Noah and myself to share when Dave was gone for his army training.
I treat the hens basically the same as I would a regular chicken when cooking them. First and foremost, you want to take them out of the wrapper and rinse them well under cold water. Pull off any stray feathers, run water into the cavity and just really rinse it out.
After that, you'll want to pick a baking pan that is an appropriate size for the number of hens you will be roasting. I am roasting 3 hens, so I am using a 9 x 13 glass baking dish. Place the rinsed hens into the pan, and pat them dry.

Next, you'll want to stuff the cavity with whatever you'd like. Since I'm on the Paleo diet and am not eating grains or bread, I stuffed each of these simply with some chunks of onion, some pieces of celery, a couple of baby carrots, a couple of cloves of garlic, and some dried rosemary leaves.

You won't want to leave the birds floppy during baking; in order for them to bake nice and evenly, you should truss them. You don't have to use twine or anything else to truss them, you can do it completely without anything extra or special. First, flip the wings up and behind the hen's neck. I always think of it like the chicken is relaxing, holding its head with its hands... Anyway, the wings will look like this picture if you do them right:

To truss the legs, you'll want to find the excess skin that is between the base of the cavity and the legs, and you'll make a hole in that skin, either with your finger or a knife.


Now put the legs through the holes you've made on each side of the chicken, so that the chicken is crossing its legs and they are secure.

Now, to season the bird. My absolute favorite way to do a roast chicken is to rub it all over with butter. Since I am not doing dairy (and I don't want to die of a heart attack, as much as I love doing it the butter way), I used olive oil instead. Rub all over the outside of the chicken, and then lift up the skin and rub under the skin as well. This helps make the skin extra crispy, and keeps the meat really moist, too.


After you have the hen nicely rubbed down with oil, season it with the spices of your choice. I mixed up a spice rub that is a combination of lots of different spices, including garlic powder, thyme, marjoram, paprika, salt, pepper, and a little bit of a *secret* ingredient- cinnamon. Again, rub the spices both on the outside and under the skin.


Now your game hens are ready to roast!

Put them in the oven at 350 degrees for about an hour to an hour and 15 minutes, depending on the size of the birds. To brown the skin, turn the oven up to 400 degrees for the last 5-10 minutes of roasting time.
To roast the veggies for the puree, simply clean them, cut them into pieces (they can be fairly large), and spread them on a baking sheet. Remember to save any of the parts you cut off to use in stock! For tonight's supper, I am roasting cauliflower and carrots, and a head of garlic to puree with them to make mock mashed potatoes.


Let the veggies cool, then put them into your food processor and pulse it to make a rough puree. I don't know about other husbands, but mine doesn't want to feel like he's eating baby food, so I just puree the veggies to the point where they're still pretty chunky. Put them in a serving bowl, and warm them before you eat!

Put a lid on the pan, and just let the spinach wilt down. Once it is mostly wilted, then you can stir it around and mix the olive oil and flavorings into it. Sprinkle with salt or whatever other spices you want, and serve. Spinach only takes maybe 5-10 minutes total to prepare and cook, so save this for the last thing you do, right before you serve supper.
Enjoy your supper! I know we will enjoy ours :)

Here are the leftover carcasses and the veggie bits and pieces, turning into stock!
Kale chips
I've seen lots of recipes for these lately, and I've been saying for a week that I was going to turn the two bunches of kale in my fridge into chips, so today I finally did!
These were SO easy, and turned out really yummy for my first time trying them! I can totally see these becoming a staple snack item at my house, even if I'm the only one who eats them... although I think if Dave and Noah tried them, they'd probably like them too :)
To make them, you need 1-2 bunches of kale. When you're picking out a bunch of kale at the store, make sure it is crisp, not limp, and I have heard that kale is one of those veggies that you really should buy organic if you can. I have some seeds planted out back, and I'm really hoping they come up and grow well, because I love kale!

Start out by trimming the stems from your kale leaves, and then tear up the leaves into 2-3 inch pieces. I didn't wash my kale before cutting it, I just threw the pieces right into my salad spinner to clean them.

Don't throw those stems away though- collect them in a bowl to clean and then add to your next pot of stock! I had just cut up some celery before this, and I am making Cornish Hens for dinner tonight, so I threw the stems and the celery ends into a stock pot to wait for the hen carcasses after dinner, they should make some nice stock.

After your pieces are cleaned and spun dry in your salad spinner, put them either in a large bowl or a zip-top bag. To my kale pieces, I added 1 tbsp of olive oil, 1 tbsp of pomegranate infused red wine vinegar, some kosher salt, and some garlic powder. Then I closed the bag and shook it all up to coat the kale pieces.

When your pieces are nicely coated and seasoned how you want them, spread them onto a baking sheet lined with parchment paper, or if you don't have any parchment paper, you can spray it with cooking spray or drizzle it with olive oil.

Now put the pan into a preheated 350 degree oven, and let the kale roast. I didn't pay attention to how long it took, but it was probably at least 15-20 minutes, and I shifted and sort of scooted the kale around a few times in that length of time, to make sure it was cooking evenly.

Now let your kale chips cool off a little bit, and then enjoy! These are a great, super healthy alternative to potato chips or even popcorn, for someone who can't eat those things... but don't believe it when you read recipes and they say "these taste just like regular chips!"... it's not true, and if you expect them to taste like potato chips, you probably won't like them!

Monday, March 29, 2010
Natural Egg Dyes
*Because these dyes are natural, they will not be nearly as deep or vibrant as the artificial colors usually used for egg dyes*
As Easter approaches, coloring eggs has been on my mind. This is the first year we plan to color eggs with Noah. We bought the artificial color PAAS kit that I grew up on to use... but then I found these ideas for natural egg colors! Even better news- I've been boiling a lot of eggs lately to eat, and with these natural colors, you actually color the eggs while they are boiling!
Here are the directions for this super simple, eco-friendly project, using things you have around your house!
Ingredients:

Directions:
Wash the eggs to remove any coating. Bring water, dye items, and vinegar to a boil. Add room temperature eggs and reduce heat to a simmer. Cook for about 15 minutes, remove from heat, cover, and let sit another 15 minutes or more, until desired color is achieved. (The longer you leave the eggs in the dye, the deeper the color will be.) Remove the eggs from the water, rinse them, and let them dry.

Dye Items: (items are written in the color they produce)
Red Cabbage Leaves, Blueberries, Red Onion Skins, Pomegranate Juice, Beets or Beet Juice, Grape Juice, Hibiscus Tea, Paprika, Yellow Onion Skins, Ground Turmeric, Cumin, Orange and Lemon Peels, Spinach Leaves, Chili Powder, Black Walnut Shells, Black Tea, Ground Coffee

The next time I boil eggs I think I will try yellow or orange. Noah loves hard boiled eggs, and Faith likes the yolks, so I am going to keep a list of these dye items in the door of one of my cupboards, so we can have pretty colored eggs all year long!
Have fun and happy egg dyeing!!
As Easter approaches, coloring eggs has been on my mind. This is the first year we plan to color eggs with Noah. We bought the artificial color PAAS kit that I grew up on to use... but then I found these ideas for natural egg colors! Even better news- I've been boiling a lot of eggs lately to eat, and with these natural colors, you actually color the eggs while they are boiling!
Here are the directions for this super simple, eco-friendly project, using things you have around your house!
Ingredients:
- 4 cups filtered water
- 1 tbsp white vinegar
- 4-6 raw, white eggs
- Dye items (listed at the end of this recipe)

I used spinach, the stems from 4 broccoli crowns, and a handful of dehydrated blueberries, in an attempt to make a blue-green color
Wash the eggs to remove any coating. Bring water, dye items, and vinegar to a boil. Add room temperature eggs and reduce heat to a simmer. Cook for about 15 minutes, remove from heat, cover, and let sit another 15 minutes or more, until desired color is achieved. (The longer you leave the eggs in the dye, the deeper the color will be.) Remove the eggs from the water, rinse them, and let them dry.

When adding the eggs to the boiling water, be very careful. I used a silicone coated spoon to lower them into the water, and nestled them into the dye items.
Dye Items: (items are written in the color they produce)
Red Cabbage Leaves, Blueberries, Red Onion Skins, Pomegranate Juice, Beets or Beet Juice, Grape Juice, Hibiscus Tea, Paprika, Yellow Onion Skins, Ground Turmeric, Cumin, Orange and Lemon Peels, Spinach Leaves, Chili Powder, Black Walnut Shells, Black Tea, Ground Coffee

I rubbed the egg on the bottom in the middle as I rinsed it, this made a much paler color. I like them both ways... They came out pretty! Someday I dream of having chickens that lay blue eggs :)
The next time I boil eggs I think I will try yellow or orange. Noah loves hard boiled eggs, and Faith likes the yolks, so I am going to keep a list of these dye items in the door of one of my cupboards, so we can have pretty colored eggs all year long!
Have fun and happy egg dyeing!!
Friday, March 26, 2010
Click here to help me reach my goal!
Every day, thousands of babies are born too soon, too small and often very sick. Faith was one of those babies. Faith was born with a birth defect called gastroschisis, suffered from a complication called chylothorax, and developed a deadly condition known as TPN-Associated Liver Disease (TPNALD).
Unfortunately, the options for treating TPNALD are very limited, and often the only "treatment" offered is organ transplantation. However, thanks to research that the March of Dimes has helped to fund, there is another option now available for babies with TPNALD- Omegaven. Omegaven saved Faith's life, along with the lives of many other babies.
We're walking in March for Babies because we are eternally grateful to the March of Dimes for helping to fund this lifesaving research, and we want to raise money to fund more research like this. And we need your help.
Please support our walk. Making a secure donation is easy: just click the 'donate now' button on this page. Thank you for helping us give all babies a healthy start, and go to Faith's blog to read more of her story!
The mission of March of Dimes is to improve the health of babies by preventing birth defects, premature birth, and infant mortality.
Friday, March 12, 2010


Subscribe to:
Posts (Atom)